
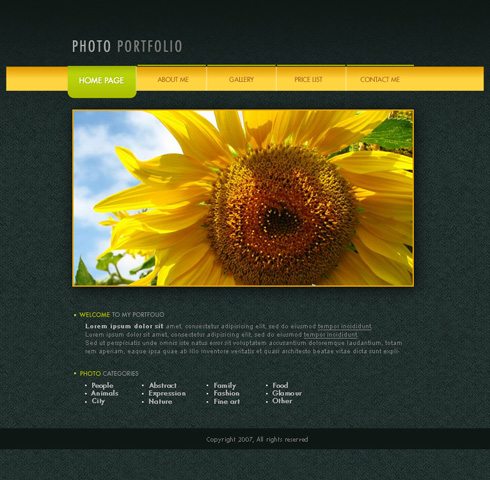
This tutorial will show you how to create a clean looking web layout for your portfolio.
Create a new file (File>New) with 766×750 px and 72 dpi. Next use the Paint Bucket Tool (G) to paint the new layer with this shown color – #0F1715

Find in Internet a kind of pattern, like this one:
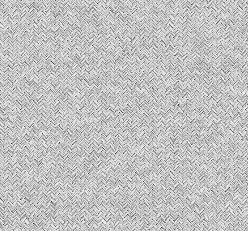
Edit>Define Pattern. Create a new layer and select this option Edit>Fill, to insert the pattern on our main picture.

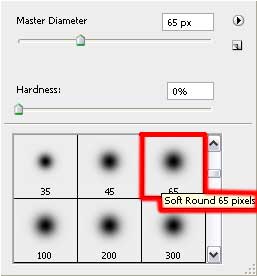
Make a mouse click on the same layer on Add a Mask option that may be found on the lowest part of the layers’ panel. Next choose the Brush Tool (B) and Opacity of 20% of black color to clean out the upper part of the picture.

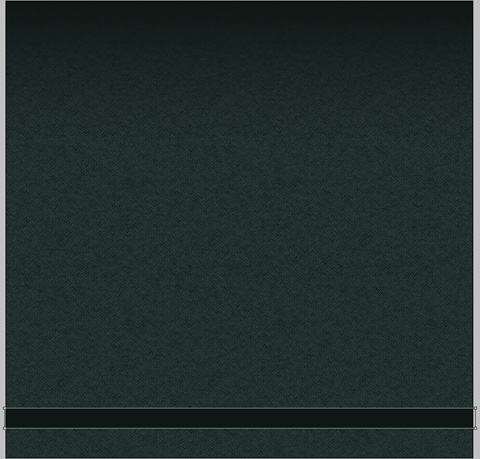
Select for this layer these parameters: Blending mode-Soft Light

The Rectangle Tool (U) is helpful in drawing a thin stripe on the lowest part of the picture. The element’s color is#0F1715
Using the same instrument, it’s possible to represent the menu’s panel, reserved for the site’s header.
Apply the next parameters by making a mouse click on the layer we work with on the layers’ panel.
Blending Options>Gradient Overlay
Gradient’s parameters:
Use the Rounded Rectangle Tool (U) with a radius of 10 px to draw on the menu’s panel a button. Next stage we should hold on Alt button while using the Rectangle Tool (U) and cut out the unnecessary elements.

home page

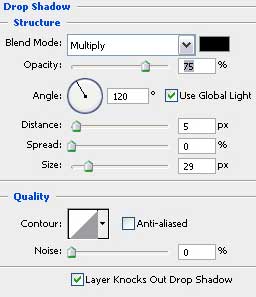
The layer’s parameters: Blending Options>Drop Shadow


Insert also the inscription of the site’s name:

PHOTO

PORTFOLIO

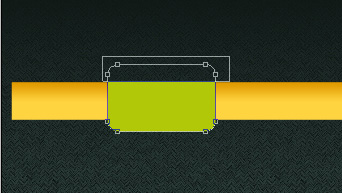
Next select the Rectangle Tool (U) to represent a layer reserved for placing the photos of our portfolio. It doesn’t matter what kind of color you choose for the layer.

The layer’s parameters: Blending Options>Drop Shadow
Blending Options>Stroke


Select a photo of the portfolio and place it above the reserved layer, on the layers’ panel.

Create a new file (File>New) with 766×750 px and 72 dpi. Next use the Paint Bucket Tool (G) to paint the new layer with this shown color – #0F1715
Find in Internet a kind of pattern, like this one:
Edit>Define Pattern. Create a new layer and select this option Edit>Fill, to insert the pattern on our main picture.
Make a mouse click on the same layer on Add a Mask option that may be found on the lowest part of the layers’ panel. Next choose the Brush Tool (B) and Opacity of 20% of black color to clean out the upper part of the picture.
Select for this layer these parameters: Blending mode-Soft Light
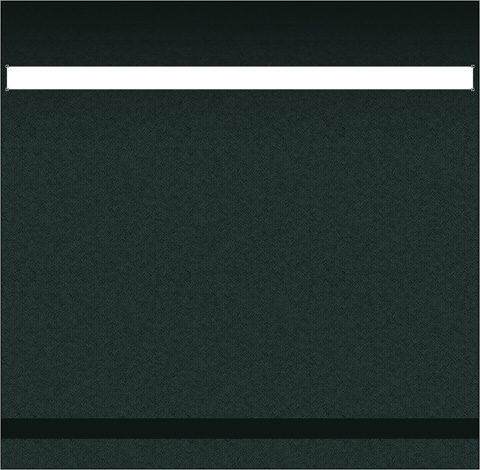
The Rectangle Tool (U) is helpful in drawing a thin stripe on the lowest part of the picture. The element’s color is#0F1715
Using the same instrument, it’s possible to represent the menu’s panel, reserved for the site’s header.
Apply the next parameters by making a mouse click on the layer we work with on the layers’ panel.
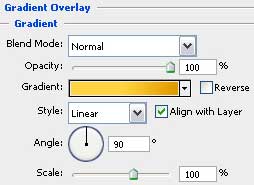
Blending Options>Gradient Overlay
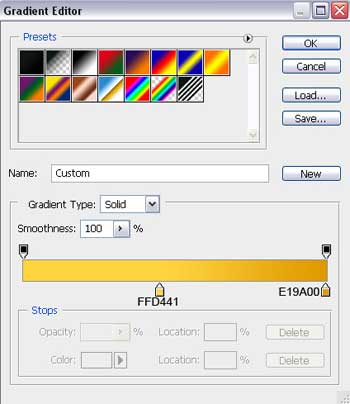
Gradient’s parameters:
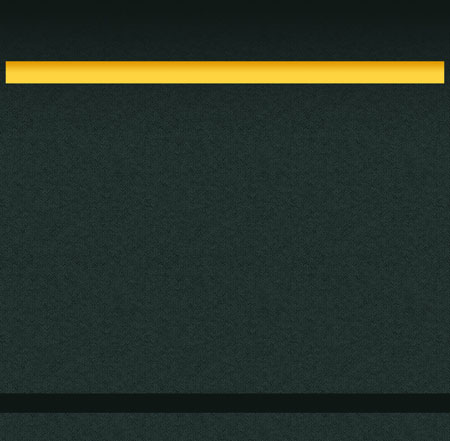
Use the Rounded Rectangle Tool (U) with a radius of 10 px to draw on the menu’s panel a button. Next stage we should hold on Alt button while using the Rectangle Tool (U) and cut out the unnecessary elements.
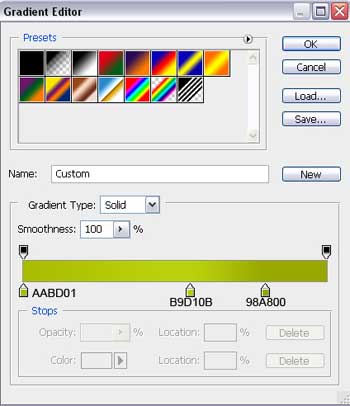
The layer’s parameters: Blending Options>Gradient Overlay

Gradient’s parameters:

Select now the Line Tool (U) (weight 2 px) to represent a line above the menu’s panel on the site’s header. The beginning color is white. Select after that the Free Transform option to make the appropriate corrections on the color’s edges; letting down the frame (the edges should be very clearly defined). Press then Alt button and apply the same instrument to interrupt the line in three demonstrated places on the same distance (the segments are equal to the earlier drawn button).


The layer’s parameters: Blending Options>Gradient Overlay

Gradient’s parameters:


Use the same tool, (Line Tool (U)), to insert on the picture four vertical lines.

Use the same parameters for each layer containing the white line. Fill 30%

Write now the titles for the buttons situated on the menu on the site’s header.


Gradient’s parameters:
Select now the Line Tool (U) (weight 2 px) to represent a line above the menu’s panel on the site’s header. The beginning color is white. Select after that the Free Transform option to make the appropriate corrections on the color’s edges; letting down the frame (the edges should be very clearly defined). Press then Alt button and apply the same instrument to interrupt the line in three demonstrated places on the same distance (the segments are equal to the earlier drawn button).
The layer’s parameters: Blending Options>Gradient Overlay
Gradient’s parameters:
Use the same tool, (Line Tool (U)), to insert on the picture four vertical lines.
Use the same parameters for each layer containing the white line. Fill 30%
Write now the titles for the buttons situated on the menu on the site’s header.
home page
The layer’s parameters: Blending Options>Drop Shadow
Insert also the inscription of the site’s name:
PHOTO
PORTFOLIO
Next select the Rectangle Tool (U) to represent a layer reserved for placing the photos of our portfolio. It doesn’t matter what kind of color you choose for the layer.
The layer’s parameters: Blending Options>Drop Shadow
Blending Options>Stroke
Select a photo of the portfolio and place it above the reserved layer, on the layers’ panel.
Hold on Alt button and make a mouse click between the photo’s layer and the reserved layer for the photos and the selected photo will be placed immediately in limits of the reserved layer for the photos.


Insert the necessary titles of the divisions.

WELCOME, PHOTO

TO MY PORTFOLIO, CATEGORIES

Now we should represent by rectangle to the left side of the divisions. Each one should be situated on a different layer and the instrument used in this case is the Rectangle Tool (U).

Use the next parameters for the rectangles’ layers: Blending Options>Gradient Overlay

Gradient’s parameters:


Fill the division with the corresponding text:

the bold text

the basic text of the division

Insert the necessary titles of the divisions.
WELCOME, PHOTO
TO MY PORTFOLIO, CATEGORIES
Now we should represent by rectangle to the left side of the divisions. Each one should be situated on a different layer and the instrument used in this case is the Rectangle Tool (U).
Use the next parameters for the rectangles’ layers: Blending Options>Gradient Overlay
Gradient’s parameters:
Fill the division with the corresponding text:
the bold text
the basic text of the division
the link

Fill the next division with the appropriate text:


Use the same method we did when representing the rectangles near the divisions’ names for representing this time on different layers white rectangles on the left side of each division’s category. The instrument is usual, Rectangle Tool (U).

Write the copyright of our web site.


Creating the web site is finished!
Fill the next division with the appropriate text:
Use the same method we did when representing the rectangles near the divisions’ names for representing this time on different layers white rectangles on the left side of each division’s category. The instrument is usual, Rectangle Tool (U).
Write the copyright of our web site.
Creating the web site is finished!
No comments:
Post a Comment